Tie Plates

There is no doubt that adding tie plates creates realistic track work. It can be and is a very tedious process. One thing I am experimenting with is a jig that is similar to my tie jig. The idea for tie jigs has been around for a long time and they are very beneficial, especially since ties can be placed and made into strips ready for mounting while doing something else as mundane as watching TV.

After installing a lot of the little critters recently I began to think about the possibility of jigging the placement, at least on straight sections. So, I took my tie jig and added a thin section using the tie spacing as a guide. The thin guides are made from .010 styrene and lie slightly below the tie plates them selves. To use I slide a bunch in place, add a strip of narrow tape, and lift. That part works okay and is faster and with better control. My plan is to mount them on the ties by applying a thin bead of GOO underneath where they will be placed, put the tape strip in place, and leave things alone until the glue sets. I think the trick will be to control the tiny amount of GOO needed. The GOO is flexible and will allow adjustment where necessary. Check with me later for a report.ImageImageImage

Ben

Backdrop Considerations

I noted that there was an interesting discussion posted on the P48 Modelers group concerning backdrops and what to construct them from. On my old railroad I used several types and based on that experience and others, here’s my plan. I say plan because I am not quite ready to put it into position. Some adjacent track work and scenery needs to come first.

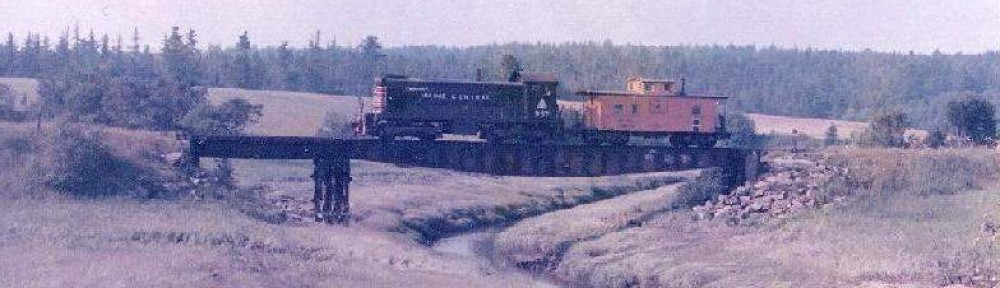
In considering a backdrop one needs to also consider whether or not it will be used as a surface for painting or gluing a preprinted image, or a photo mural. In my case with  the MEC Eastport Branch I have chosen a photo mural application. The mural has been prepared by Dave Burgess of Backdrop Junction using several of my photo files of the prototype scene. The image has been printed on adhesive backed vinyl. I point this out because the type of material chosen does bear on the choice of backing material. In my case the printed image comes in roll form. To be applied it needs to have the release paper removed that protects the adhesive. The removal process is a slow and steady one. My image is two feet wide and seventeen feet long. The release sheet needs to be started at one end and slowly removed as the adhesive is pressed into the backing material. The adhesive is activated by rolling on top of the vinyl as the process moves along. By using a roller applicator and care to control the unrolling to avoid wrinkles, the image is applied smoothly and without stretching. It is similar to applying hard laminate with contact adhesives , but thinner and much more flexible. It is very important to have the backdrop backing in place before the process starts. My backing is curved at one end requiring the image to be applied while the curve is in place. The image cannot be applied flat and then bend the backing or wrinkles will occur. Therefore I have chosen Masonite as the backing material. That being the case, consideration must be given to sealing the Masonite to avoid absorbing moisture and shrinking or swelling which can happen to this wood based product. Since I have boat building experience and knowledge of rendering wood waterproof, I have decided to work with a favorite material that I am never without. It is an epoxy system made by West System. I call it a system because depending on how it is mixed the epoxy can serve as a saturant, an adhesive, or a putty.

My first area of backing will require two full sheets two feet wide and a partial third sheet. I will use a butt joint which means bringing two sheets together tightly and backing up the joint with another piece of the same material glued to the back and clamped until cured. This can be done in my case for convenience while the sheets are flat. Once the joints are made I will coat everything with a coat of the liquid epoxy resin which will seal and make the structure waterproof. Any countersunk screw holes from mounting and the joints will be faired with the same resin with filler added which will yield a continuous smooth sheet. One of the main reasons in using the Masonite is its relative stiffness vs. styrene, foamcore,  or aluminum roll stock. None of those materials are rigid enough to avoid flexing while rolling on the photo mural. Untreated Masonite will pick up moisture and move. Plain soft Masonite is the worst. Tempered Masonite is better, but still needs the sealing step. A photo backdrop is expensive and I wouldn’t consider installing one with out protection. If any one has interest in a video showing the application method, then go the Backdrop Junction website and scroll to reach the videos.

The above is a very specific application. A different choice may require other choices. For instance Backdrop Warehouse products are printed on heavy paper similar to wall paper and can be applied to the backing with paste and a brush. That is different from what I have chosen. On my former railroad I did use that method and the backing was foam core, -but, the section was straight and needed to be light and stiff because it was applied to the layout as an after thought when things were pretty much completed, and it was only twelve feet long.

Ben

Calais in March

Image

Calais freight house north end

Image

Calais freight house road side

Image

Calais throat switch north end

Work continues on the Calais end of things. I’ve started installing the switches at the north end of the yard. I realize you all are familiar with R-O-W components which are great time savers, not to mention the improvements in detail. I have included a photo of a partially completed which is the primary throat switch. The frog has been pre-wired and the lead has been brought out to the terminal block at the front edge of the layout. Eventually the engine house will be located beside this location. As of this date the engine house is constructed with basic sheathing of corrugated metal and is only lacking the roof top ventilator. The ventilator is a rather large odd shaped sheet metal duct that I plan to turn from wood.

The freight house has been completed in the shop and sports its base paint job. Lots of weathering is next which will bring out the character of a well used building subjected to a series of Maine winters. The wood platforms and stairways are on hold until I can determine how best to fit it into the surrounding terrain between the road and the siding.

Ben

Front side wiring

OLYMPUS DIGITAL CAMERA

DCC Buss Terminal Blocks

I have decided to bring all layout wiring to the front edge as shown in the photo. The two wires shown are feeders from one of the tracks in the rear. Other feeders will be brought forward in the same manner from other tracks. One of the terminal blocks will be connected to one DCC buss and the second terminal block to the other DCC buss. Other circuit boards such as frog juicer and servo control will be mounted on this same face. Spacers will be mounted every so often as supports for the finished fascia to be mounted. I plan to use Masonite as the finish fascia. I haven’t quite decided, but am thinking about magnets to hold it in place. I have wireless DCC and will not need sockets. Not all turnouts will need servo control, only those out of reach. For those with servo control, access for override toggles will be provided. Toggles will be probably mounted on the edge board and a large hole to reach through the fascia will be needed. This portion will need to be tested for convenience. The edge board is six inches high and top edge is flush with the basic layout surface. The fascia will vary in height above the bench work depending on the requirements.

The MEC railroad will have simplified wiring without signals because the prototype was a ‘dark’ branch with daylight operation and only one train on the line. My last railroad was fully signaled, so already I am enjoying the new simplification.

Ben

Calais in February cont’d


Image

Throat Switch

Image

Track Jigs

Image

Calais Yard north end switches

The next several photos will show the current state of track work. The throat switch entering the yard from the north is shown. this switch will be located just outside a short tunnel which serves as a view block to the north (left facing the yard).

A series of switches are being laid out on the north end of the yard. I am laying out the various stock rails and spiking them into position. Much of the prototype yard trackage is buried in gravel with ties showing sporadically. Where the ties show, so will the tie plates. The trick is to plan ahead where the plates will be exposed. I’m a thrifty Yankee and only want to place tie plates where they will be useful. While the stock rails are being installed, the switch parts are being prepared in the loft workshop.

The third photo shows a couple of simple jigs to aid in the track work. The first is a marked stick I use to mark where I will cut notches in the rail at 39 foot intervals. Rail joiners are glued over these notches to simulate standard length rails. The other jig was made by taking my flat metal standards gauge and mounting it on a thin wood plate. This holds the jig upright and it just slides along as I spike. The measuring tips protrude just enough to serve the purpose. Simple, but very effective.

Ben


Calais at the end of February

Image

St Croix River Basin

It has been a while since I last posted, but that doesn’t mean I have been sleeping. The railroad has been coming along nicely, and for those of you who are new, it is being built in my daughter’s basement which is about ten minutes from our house. Most week days are work days and the schedule is from 10 am to 3 pm. For tasks other than actual railroad work such as structures and rolling stock take place in the loft, which is a great room that I have over the garage. Progress has been steady and so far I am pleased.

The St. Croix River basin has been adjusted to have an uneven bank with a couple of protruding embankments representing what is left of former railroad wharves. Note that the stud wall to the left will be kept open until those areas closest to the river are completed. Then a Masonite backdrop will sheath the wall. This past month Dave Burgess at Backdrop Junction took several of my photos and produced a great photo mural which is the view one has when standing and looking at Calais yard. Installation will have to wait, but I am excited about the potential of the scene with the backdrop in place. The plan is to match the river at the bottom of the mural  with a resin poured river. The mural suggests that the river in the view is blue which reflects the sky. My wife the artist has offered to paint the river the proper colors before I pour the resin. Viewers to my version of Calais yard will see the same view as in real life. Painting the river a sky blue should be an interesting challenge.

Ben