Pouring Water

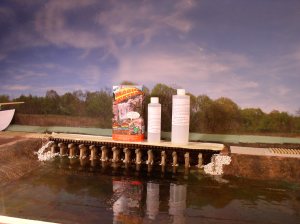
Today I checked the results of the first layer of resin ‘water’. The Instant Water product was used in the Pennamaquan River feature. After 24 hours, it was still tacky. Perhaps tomorrow it will be finally cured and ready for another layer. This product is less viscous than the epoxy resin I have been used to. It mixes and pours easily. From an O Scale point of view I think it is too expensive for the area covered. It appears to be more ideal for the smaller scales. If you look closely you can see one of the plaster cloth seams that should disappear in the next pour. I have run out of the IW, so my regular resin will be used next.

OLYMPUS DIGITAL CAMERA

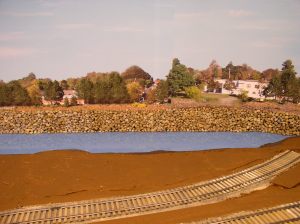
For the St. Croix River I used a 1:1 epoxy product called Top Coat which was mentioned in the last post. Because of the viscosity it yielded a thicker coat. It also cured well in less than 24 hours. My observation is that the reflective color that I seek is still a bit too bright blue. I plan to cut in a bit of blue colorant in the next pour to try and tone it down a bit. Keep in mind that the effect I’m after is a live viewing effect and as a result it does not photograph as well as personally viewing it.

OLYMPUS DIGITAL CAMERA


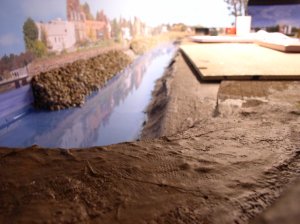
The next photo looks down the length of the river which is far too narrow compared to the actual river, but it is a necessary compromise. normal viewing is the photo above, not this one. The plywood sheet keeps me from damaging the yard track in Calais.

OLYMPUS DIGITAL CAMERA

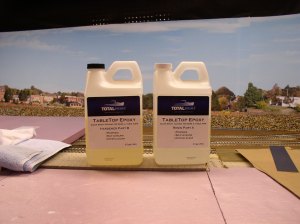
This next shot simply shows what the Top Coat product looks like. The 1:1 ratio is quite easy to deal with compared to the normal epoxy that has a more complex ratio. Those usually require special pumps to meter out the proper amount of both resin and hardener.

OLYMPUS DIGITAL CAMERA

For both of the above products, mixing needs to be smooth, deliberate, and slow to minimize the amount of trapped air and to avoid bubbles. It usually takes about 5 minutes to be thorough. Any bubbles that do show up in the uncured resin can be removed by touching them with a pointed stick. Then they will flatten out nicely.

Ben

Water Everywhere Almost

The first day back working on the railroad was greeted by the news that my daughter’s laundry sink upstairs had over flowed. Fortunately no water was deposited on the railroad itself. The leakage missed filling Eastport Harbor by several inches. That’s a close miss and a relief because at the moment the surface of the harbor is bare plywood and I’m sure it would have separated into a mess that had to be removed.

So, the dehumidifier is running flat out to remove the residual moisture. After a bit of cleanup, my task today was to wipe down the surfaces of the Pennamaquan River and the St. Croix River in preparation for what I hope is tomorrow’s first pour of resin. I’m planning to use Instant Water for the Pennamaquan. It is a 1:2 mix epoxy resin, almost clear with a slight amber tint. I have not used this product before and will test its use and appearance on the first layer. I suspect there will be two layers in total.

The St. Croix will receive coats of a new clear 1:1 mix epoxy made by Jamestown Distributors. If you don’t know about Jamestown, it is a marine supply business located in Bristol, RI. My other hobby for most of my life was building boats, due to our former location on the Massachusetts coast. I have used Jamestown for most of that time and rate them as an excellent source. If you are curious, check their hardware prices as well.

http://www.Jamestowndistributors.com

The rivers have been prepainted prior to pouring the resin, the St. Croix is a sky blue which I hope will simulate the reflection of the sky in the background, while the Pennamaquan is green along the edges fading to almost black in the center of the stream. Eventually Eastport Harbor will be a dark blue representing the deep water port that it is. Eastport is planned to be flat calm to allow the changing of the many flat bottom boat models that I have. I hope to make the photography of the scene varied at different times.

Sorry no pictures this time around, but hopefully I’ll get some tomorrow during the pour.

Ben

The Cost of Compromise

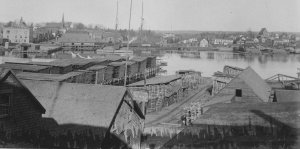
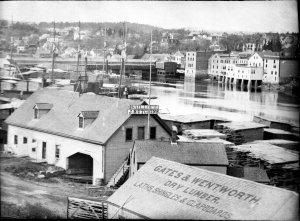
I came across a couple of photos of the earlier era Calais waterfront relating to sail making. They do not apply to my current modeling efforts because the reflect the days of coastal schooners and steam engines. The era I chose is after all that got shut down.

Waterfront in St Stephen in background. Eaton Long Wharf, bottom of Calais Avenue

Waterfront in St Stephen in background. Eaton Long Wharf, bottom of Calais Avenue

What caught my attention is exactly how much real estate was devoted to shipping between the St. Croix River and the rail yard. Since I have very strong early memories of growing up near such tidal shipping served by rail, I would love to model that whole harbor area. Can’t you see the myriad of details resting there?

Calais waterfront, covered bridge

Calais waterfront, covered bridge

In the era shown tracks curved at right angles from the yard onto piers for loading the ships. In my era, the buildings have all disappeared, the wharves are gone and a few bulges from the landscape into the river bank is all that is left from the scene above.

I figure that I would have to add another six feet in width between my current rail yard and the river bank. I have only two feet. Such are the compromises required for modeling especially in O Scale.

Across the river is St. Stephen New Brunswick that had its own rail and wharf connections. Well, I can dream can’t I ?

Ben

Current Status

I’ve been able to spend part of the last two days working on the railroad. it’s nice to get back to work after having been delayed the last couple of months for various reasons. The photos will bring you up to date as far as the railroad itself is concerned.

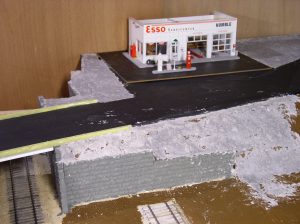
First up I was able to do a test fit of the Esso gas station that will be located on Main Street, Calais. The model was built about five years ago in anticipation of this scene. It is built from a Berkshire Valley kit of a 1950’s style white tile faced station. Various companies had them. Mine was obviously completed as the Esso version. I’m pleased with the initial fit.

OLYMPUS DIGITAL CAMERA

The rough looking gray stuff on either side of the road is the scenery base material. The stub ended track is the engine house track. It will be covered once the building is in place.

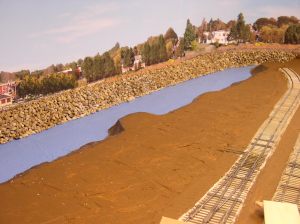
The next view is the St. Croix river basin which is about ready for the first of several epoxy pours.

OLYMPUS DIGITAL CAMERA

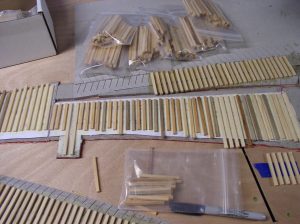
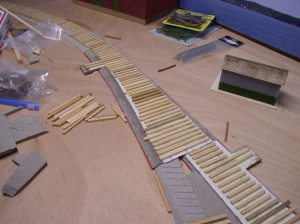
The next photos are shots of switch tie work being added to Eastport Yard. Note that around each switch base there is a red outline. These bases are temporarily held down with double sided tape until the height of the ties are planed down. Then the several switches can be removed and taken to the work bench for an easier time of spiking.

OLYMPUS DIGITAL CAMERA OLYMPUS DIGITAL CAMERA

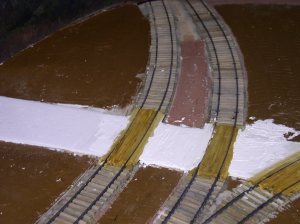
The final shot is the current status of Ayers Jct. The roadway is in the process of being raised to meet the crossing timbers.

OLYMPUS DIGITAL CAMERA

Meanwhile at the workbench I have completed the detailing of a 2-bay covered hopper which is being constructed for the Mearlcrete operation. More on that later.

Ben